Thursday, May 24, 2012

Always great to learn new things.

If you have been reading my blogs then you may have noticed my art moving from painting with acrylics to discovering the Zentangle drawing methods and that leading me to adding watercolor paint to images that I have added tangle patterns to. Then I took two classes from Joanne Sharpe and learned some very interesting lettering techniques.

I use Micron pens for my ink and watercolor paint or Tombow watercolor markers to add my color. The watercolor paper that I draw on really wears down the tips of the pens and they wear out before they run out.  Not good!  I needed to find something that would give me the color I was looking for but didn't need watercolor paper.  Strathmore makes a beautiful smooth Bristol paper that is so wonderful to draw on but the watercolor just makes a mess when I try to move it around with a paint brush.

Joanne Sharpe mentioned Copic Markers in her classes.  I had never heard about them but added a black one to my drawing pens.  The pen was expensive but refillable and I ended up going to Michaels and buying a few more colors.  Those 40% off coupons bring the price of one marker down to about what I would pay for one tube of paint.  There are over 300 marker colors!  Anyway, I tried them, and they worked beautifully, but it took me a while to figure out the blending and shading that just comes natural to me with my painting.  Again, learning new things.

I was really surprised to see the Copic company offering Certification classes right here in Regina.  I jumped at the chance to take the classes and signed up for both the Standard and Intermediate Certification Classes.  They say I am going to learn shading, color shadows, composition and design, all good things to review and relearn with a new medium.  When I'm done the classes they will add me to their list of Certified Copic Instructors and  I can add Copic markers to my list of classes I teach.

When I have some new Art work done with my Copic markers I will post them to show you and you can tell me what you think.

Hope your day is a great one, Lori


Monday, May 21, 2012

Creative Storage for your Creating Space

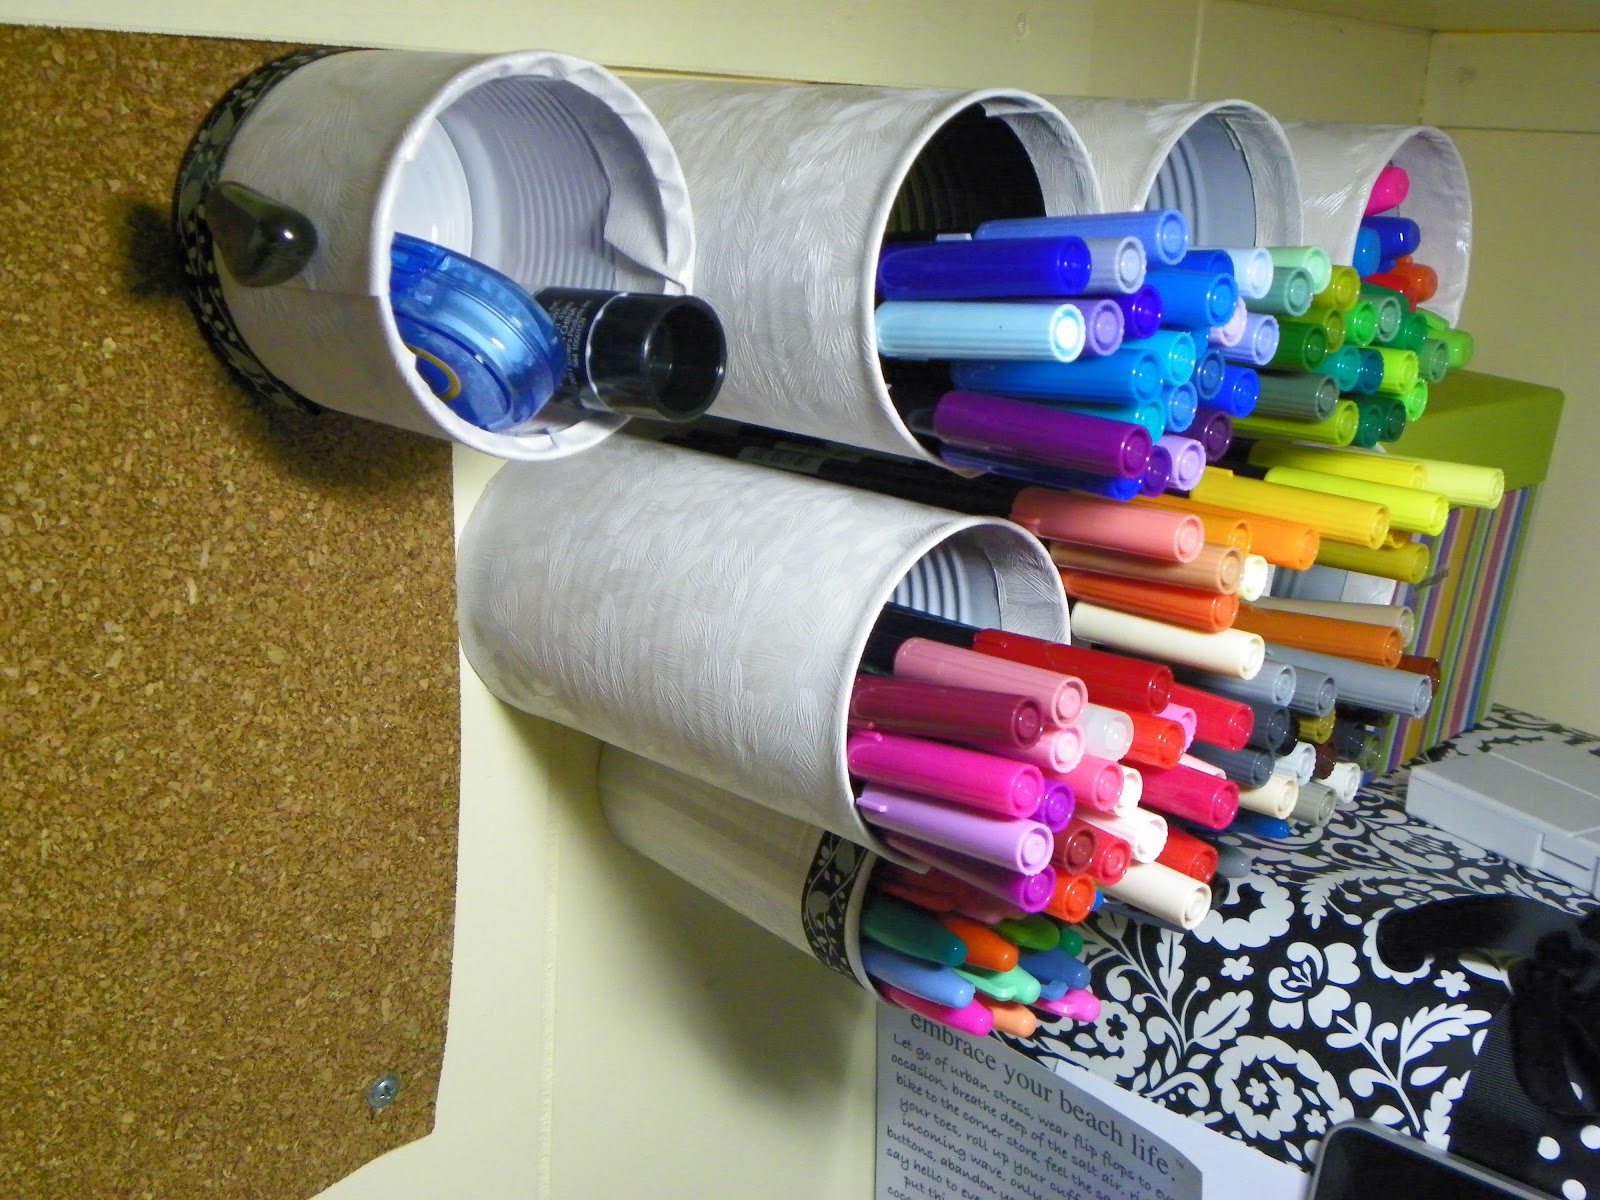
Storing all my pens has become a major endeavor.  First of all I want to be able to see them all and reach the one I want without having to fumble through a bin or drawer.  I know I'm not the only one that has this problem because I see other doodlers, zentanglers and alphabeteers asking each other how they store their tools of the trade so I thought I would show you what I ended up doing.


I need all my money for more pens so had to come up with something that didn't cost me any cash.  So recycle, right!
  
I had some left over wallpaper, the heavy kind that is actually paint-able, but any wall paper would work.  So would a magazine page, brown paper bag or your scraps of card stock but those all need to be glued and the wall paper comes with it's very own glue that actually sticks!  Next was a clean tin can.  Not the one from soup, they are to small, mine were from Hunt's spaghetti sauce actually, it is 5.75 inches tall and 3.25 inches wide.  As long as it is tall enough that your pens don't fall out while on it's side use what you have.  

Measure the paper a good 2.5 to 3 inches wider than the can is long.  In my case, 9 inches for my 6 inch can.  Cut that strip out of the wall paper.

Wrap the paper around the can and cut the length so there is an inch of overlap.  This really isn't rocket science and I know that you can figure this out on your own.


Now the really easy part.  Wet the wall paper and fold it over on it's self.  Sticky glue side to sticky glue side.  I'm not sure why, but when you wall paper your walls they always tell you to do this so I did it to wall paper my cans!  
Roll the can in the wet wall paper making sure that you push out all the air bubbles and wrap the can as tight as you can.  Leave paper over hanging both the top and bottom of the can equally.  Don't worry if you don't get it exactly in the center, as long as you have some on each end.
Tuck the wet wall paper inside the can.  This is going to help hold the paper around the can and it will also protect your pens and fingers from any of those sharp edges that some can openers leave behind.  
This is what it should look like once the top is all folded in.  


Make it nice and smooth.  
Now the bottom edge.  Take your scissors and cut from the end toward the can.  
Don't go past the can.  
Cut all around the edge.  These cuts look like they are about half to 3/4 of an inch apart.  
By making the cuts your paper will over lap nice and flat and since it is pre-pasted wall paper each section will stick to the one under it as well as the can.
This part isn't necessarily but if you don't mount your cans on the wall you may want to finish off the bottom.  Just trace the can and cut out the circle slightly inside your line.  Wet the circle and attach to the bottom of the can. 

Tidy Hey!
Since we are all so creative, we can't leave it just plain.  I took some ribbon and some adhesive.  I ran the sticky line of glue down on the back of enough ribbon to go around the can then wrapped the ribbon around the top edge of the can.  If you wanted you could color coordinate your cans.  Blue ribbon for your blue pens, red ribbon for your red pens.  Get creative!

Here is a picture of the tools I used.  Wall paper, a recycled can, scissors, a ruler, masking tape only if your paper doesn't stick right away and you want to hold it while it drys.  I got pretty good at making these and didn't use the tape for the last batch.  The ribbon and glue to stick it to the can. Washi tape would look great too.  At the time I did these I didn't have any so improvised.  

A  finished can of lovely Tombow markers!  


I took my DH's handy, dandy, power drill, added an extra long bit driver and a screw with a large head and screwed these papered cans to the wall by my work space.  If you look closely at the picture you can see the screw in the center of the can holding my glue.  If you don't have power tools, no worries, you can use a screw driver.  It just takes a little muscle to push the tip of the screw through the bottom of the tin can and hold it while you get it mounted on the wall but You can do it!  


Now go make your creative space tidy, yea right, well organized at least and let me know if you have any other ideas for organizing your work space.  


Thanks for visiting, bye for now.  

Thursday, May 3, 2012

Make your Art a Habit.

Way back in February I signed up for Joanna Sharpe's Letter Love class and she posted a new lesson every night at midnight for the full month.  After 29 days of having to be creative every day, waking up every morning and starting the lesson even before getting dress and while the coffee was brewing, it became a habit.  A wonderful habit and I have not stopped since.  My computer desk has now become my art space.  As I glance around my lap top I have pencils, water paint, paper, my markers and I feel happy.


Tuesday, March 13, 2012

Is there balance?

February was a very busy, stressful month and I think that it drained a lot out of me.  I may be just recovering now but honestly I'm still not 100% to being back to myself.  B and I have been talking about heading back to Canada and spending some time at our cabin in the woods near Nipawin.  It is our place to recharge and remember what is important in our lives.  It's a simple place with next to nothing as far as luxuries go but we get to breath the fresh air and do some physical work up there and we could both use that.

I was immersed in learning this past month and that was so exciting.  I have mentioned that I was in Joanne Sharpe's Letter Love on-line class. http://joannezsharpe.blogspot.com/  I have admired her art with it's bold colour and fun doodles so when the chance to learn from her came up I took it.  Joanne's class was a new lesson every day for 29 days, that is a lot, and for me a huge time commitment. For the most part I did each lesson every day and now that it is over drawing and lettering has become a daily habit.

I wanted to find a way to mix "Zentangle" with my drawing and the fun and funny quotes that are all the rage on Facebook and Pinterest right now.  I needed to find a way to take all those elements and turn it into something new for Me.  I also want to come up with something sell-able.  If all goes well I will be at Bizaart, the outdoor art show put on by the Mackenzie Art Gallery in Regina   http://www.mackenzieartgallery.ca/engage  again this June and I want to have something new and bright and fun to sell.  The jury process is over on March 30th so I have a few days yet until I even know if I'm going to be in the show.

Is there a way to balance all the balls that we have to keep in the air and at the same time find room to grow?


Tuesday, February 14, 2012

Happy Valentines Day

I thought it was going to be a great day today.  I woke up beside the man I love, went to my computer and saw today's Letter Love lesson and it was all about hearts, pink, red and finding as many ways to letter the word Love as I could.  I'm loving these lessons.

Then I had to go to a meeting and there was not much love in that room.  After it was over I felt like I had been run over by a truck, or at least a golf cart.  I guess I am just not cut out for the "politics" nor do I ever intend to love it like some people do.  I think there are many that thrive on it but that will never be me.  
I felt kinda crappy for a while, then I came here to my "creative space"  did some drawing, painted a little and had a great time looking at all the beautiful art that my fellow students are doing. And you know what?  I feel great again!  
I hope that you have a place or a thing that makes you as happy as my art makes me. 

Tuesday, February 7, 2012

lesson seven

It's day 7 of 28 days of learning lettering with Joanne Sharpe and her on-line course called Letter Love 101.
 

I signed up for the class because I wanted to be able to put all the wonderful quotes that I read on facebook and Pinterest and incorporate them  into my art work some how.  The class has been great and if you have time and 35 bucks it's worth every penny.  The class is cheap enough.... but I think I'm going to have a couple hundred dollars worth of great new art supplies when I'm all done.  Is there any such thing as too many supplies?  Nope!


Joanne has a great way of presenting the lessons and a fun and friendly attitude about the class.  She also made sure that her students can get feedback from her and each other.  Maybe there are tons of on-line classes and many are good but this is the first one that I have ever taken and it's a great one.  


Wednesday, February 1, 2012

Ready to Love Letter Love

I have signed up for the month long lettering class called Letter Love 101 by Joanne Sharpe and today's assignment was to prepare a book for the class.  I bought 2 Composition books from Office Depot for a couple bucks and decorated them with some card stock, fabric and zebra print duct tape.  Then we were asked to go through the book and glue 2 pages together until the book was full.  I messed up a couple of times and ended up with three pages glued together so I guess I can save those pages for really intense creations.  There is still lots of room on the book covers for more doodling but I want to keep working on them during the month.  It will be interesting to compare the pictures then and now!

I'm pretty pumped about this class.  My hand writing has never been my strong suit so I have always shied away from anything that required me to do any lettering, well, unless I had lots and lots of time, a ruler, pencil and 3 or 4 erasers.  So this class will really be pushing me out of my comfort zone but I think, well hope, that all the line weaving and tangle patterns that I have been doing the past 6 months will help me with control over the pens, pencils, Copics, Sharpies, Tombows, white out pens, watercolor paint,.  The supply list is pretty long.  Lucky I have lots of Art supplies!!


I will try to keep posts of my work up on this blog and on Lori Bradford's Art on facebook.